Introduction
Today we learn how to install and configure the 3CX PBX phone system on Debian 10 machine. As we all know, communication is a very key aspect of the well-being of an organization or any business firm. This is where 3CX comes in handy, it has amazing features such as video conferencing, and live chats just to mention but a few. One unique thing is that all these features are all under the same platform.
3CX Phone system is the software-based Private Branch Exchange(PBX) phone system. 3CX phone system enables extensions to make calls via VoIP services in the cloud.
Let’s have a look at some of the amazing features of the 3CX PBX phone system;
- Video conferencing – Employees can hold a video-conferenced meeting in full HD by joining the meeting from their remote places.
- Remote collaboration – Users are able to connect on any device or browser without needing to download the app.
- Deployment options – Customers have the chance to choose where to deploy their 3CX phone system, either on-premise or in the cloud.
- Business SMS – Users can send or receive SMS texts with their designated business phone numbers.
- Live chat – This feature allows agents to give advice and support to business website visitors as they browse through services.
Now that we know what the 3CX phone system has in store for us, let’s embark on its installation and configuration.
Step 1: System Update
First, you should update and upgrade your system packages by running:
sudo apt update
sudo apt upgrade -y
Step 2: Install necessary Packages
Now add the 3CX repository packages to your system by first importing the GPG keys used for signing packages. Run:
$ wget -O- http://downloads-global.3cx.com/downloads/3cxpbx/public.key | sudo apt-key add -Proceed and add the package repositories now that the GPG keys have been imported, for Debian 10, run:
 $ sudo apt install gnupg2 -y

Reading package lists... Done
Building dependency tree
Reading state information... Done
The following NEW packages will be installed:
gnupg2
0 upgraded, 1 newly installed, 0 to remove and 0 not upgraded.
Need to get 393 kB of archives.
After this operation, 411 kB of additional disk space will be used.
Get:1 http://security.debian.org/debian-security buster/updates/main amd64 gnupg2 all 2.2.12-1+deb10u2 [393 kB]
Fetched 393 kB in 1s (305 kB/s)
Selecting previously unselected package gnupg2.
(Reading database ... 39999 files and directories currently installed.)
Preparing to unpack .../gnupg2_2.2.12-1+deb10u2_all.deb ...
Unpacking gnupg2 (2.2.12-1+deb10u2) ...
Setting up gnupg2 (2.2.12-1+deb10u2) ...
Processing triggers for man-db (2.8.5-2) ...
Add 3cxpbx repositories to your Debian 10 server.
$ echo "deb http://downloads-global.3cx.com/downloads/debian buster main" | sudo tee /etc/apt/sources.list.d/3cxpbx.list
deb http://downloads-global.3cx.com/downloads/debian buster main
Step 3: Install 3CX on Debian 10
Begin by updating the package lists then proceed to install 3CX.
sudo apt update
sudo apt install net-tools dphys-swapfile -y
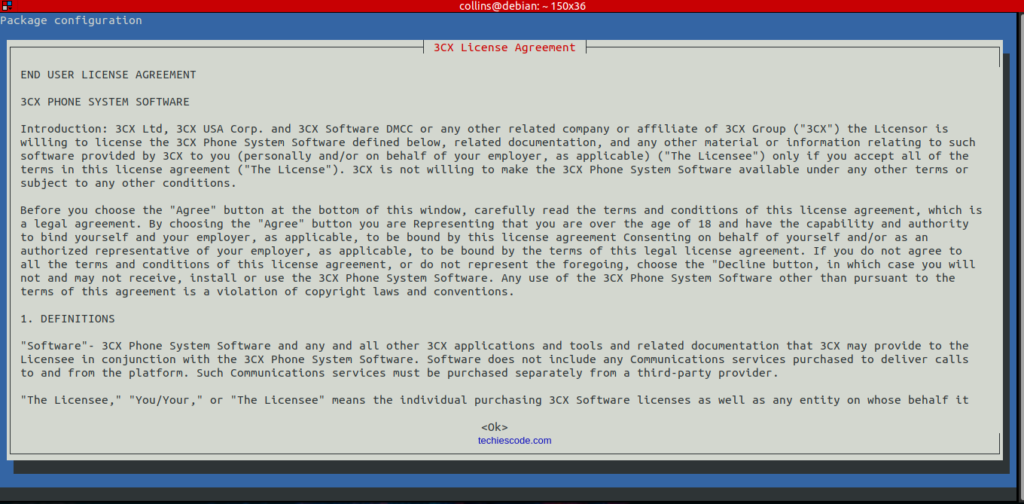
sudo apt install 3cxpbx -yThe commands will run simultaneously and after a little while, a popup screen will show for you to read and accept the agreement, select OK, and hit Enter to continue.
Upon installation, your output will be similar to the one below. Select option (1) to finish installation and configuration via a web browser.
        _____ _______  __
|__  // ____/ |/ /
/_ </ /    |   /
___/ / /___ /   |
/____/\____//_/|_|
Welcome to the 3CX Configuration Tool
Help https://www.3cx.com/docs/manual/
Press ESC to go back.
Select how to run the tool:
(1) Using a Web Browser
(2) From command line
Enter option: 1
Starting PBX Web configuration tool..
Launch this URL from a browser on another machine:
http://192.168.90.93:5015?v=2
TIP: If this is a cloud machine and the link shows a local IP address then you need to replace the local IP with your public IP Address.
Setting up nginx (1.14.2-2+deb10u4) ...
Processing triggers for systemd (241-7~deb10u8) ...
Processing triggers for man-db (2.8.5-2) ...
Processing triggers for libc-bin (2.28-10+deb10u1) ...
You can now use the URL provided to proceed with installation via browser.
Step 4: Complete Installation of 3CX Via Web interface
Using the URL from your installation, http://192.168.90.93:5015?v=2, open the 3CX web portal to wind up your setup.
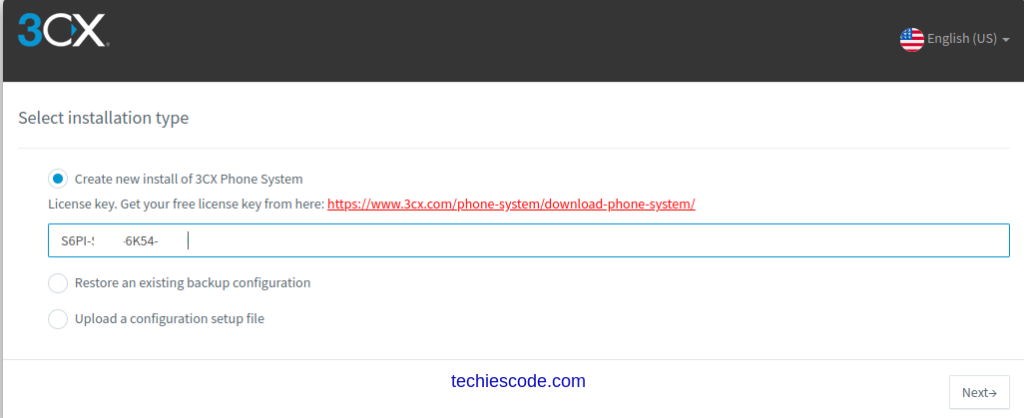
Click on the link on the page to get your free 3CX license. You will be directed to a page where you’ll have to sign up for you to be granted the license.
Once you get the license, paste it in and click next.
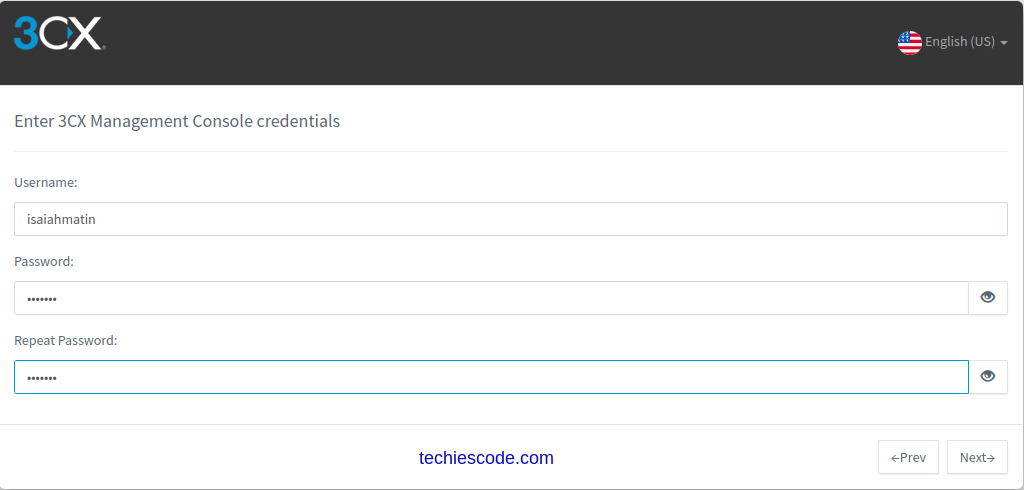
Now set your login username and password
NOTE: These are credentials that you will use to login as an admin via the admin management console. Choose more secure password and keep the credentials safe.
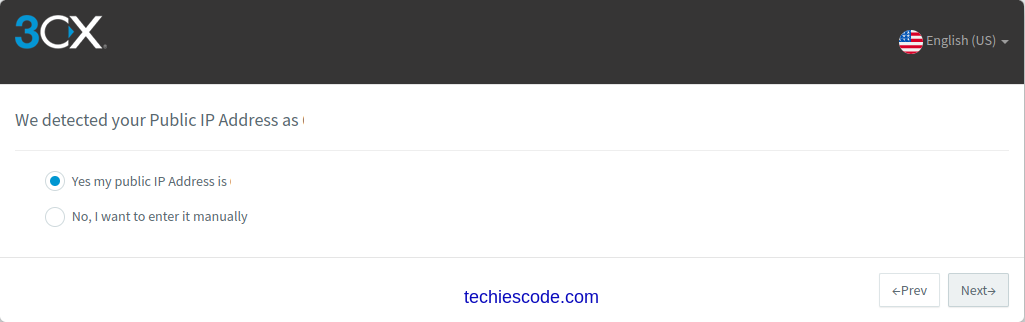
Your IP address will be detected automatically, you can as well select to enter it manually:
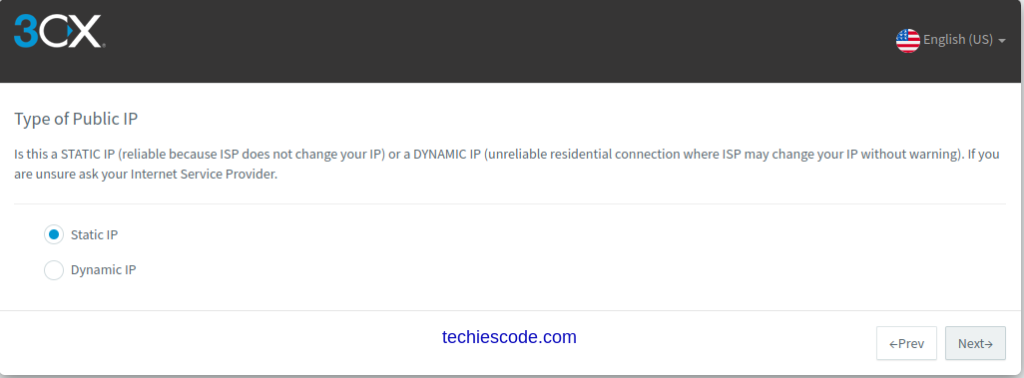
The next step will be to select the type of your IP, either static IP or dynamic IP. It is highly recommended to use static IP for the effectiveness of the system.
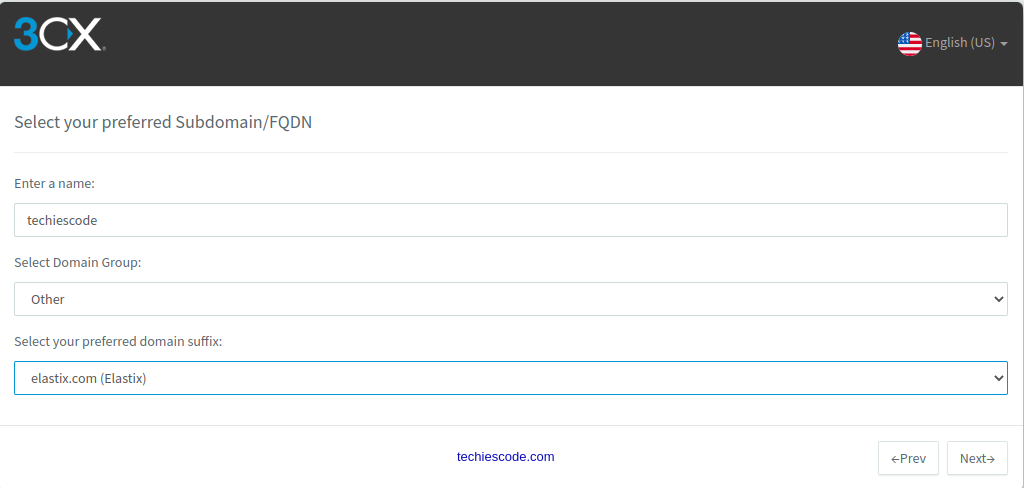
Proceed to select your preferred subdomain. To use elastic.com, under “Select Domain Group” select “other“.
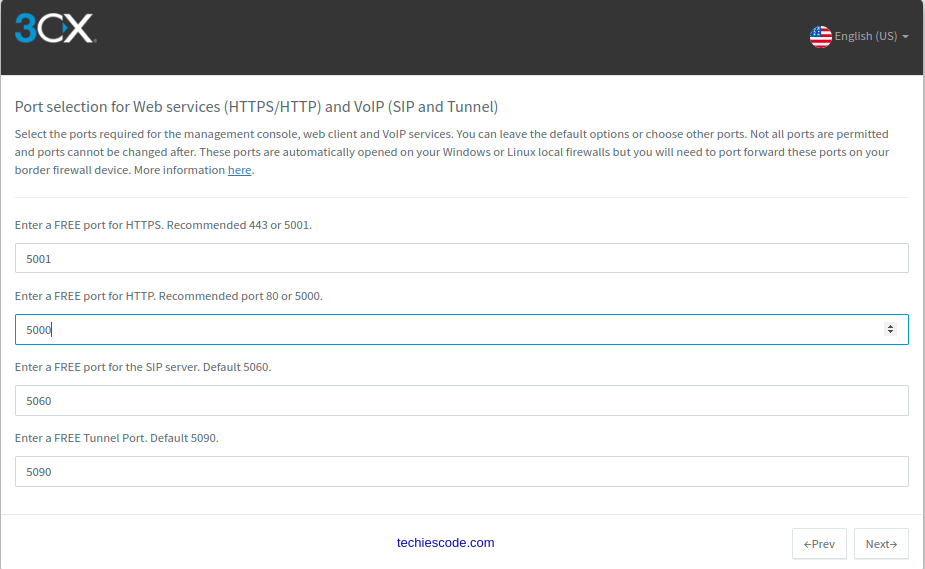
Select the port for web services (HTTPS/HTTP) and VoIP (SIP and Tunnel). By default, 3CX use port 5000 for HTTP and 5001 for HTTPS traffics. Alternatives you can use port 80 for HTTP and 443 for HTTPS.
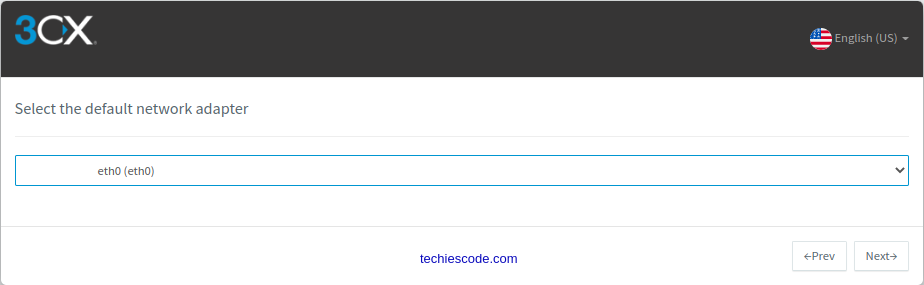
Select the default network adapter:
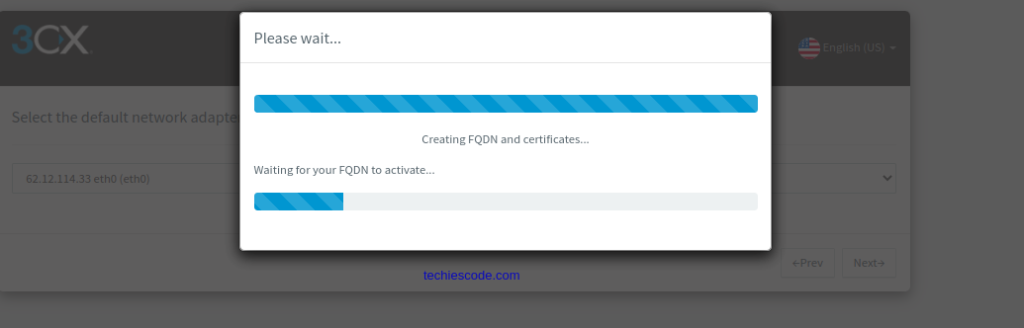
You will have to wait for the activation process to finish, it may take a while so be patient:
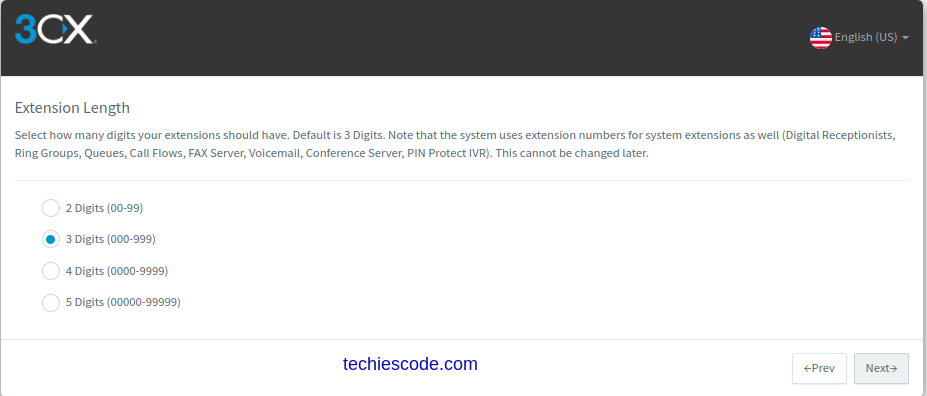
Now proceed and select the number of digits for your extension. The value you select here will determine the maximum number of extensions you can have in your system;
2 Digits (00-99) – 100 Extensions
3 Digits (000-999) – 1000 Extensions
4 Digits (0000-9999) – 10000 Extensions
5 Digits (00000-99999) – 100000 Extensions
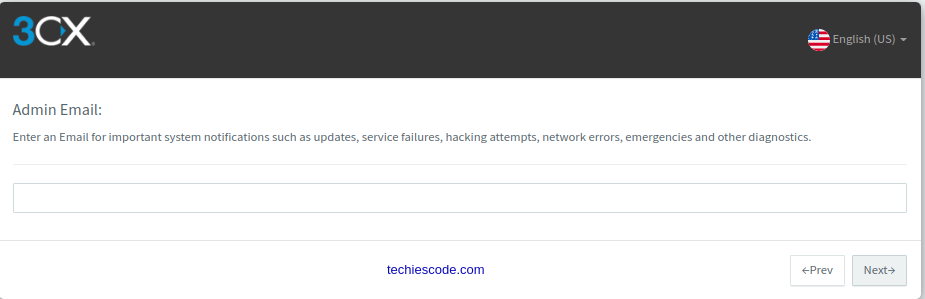
Set your email Admin. This is where you will be receiving important updates like IP blacklisting, etc.
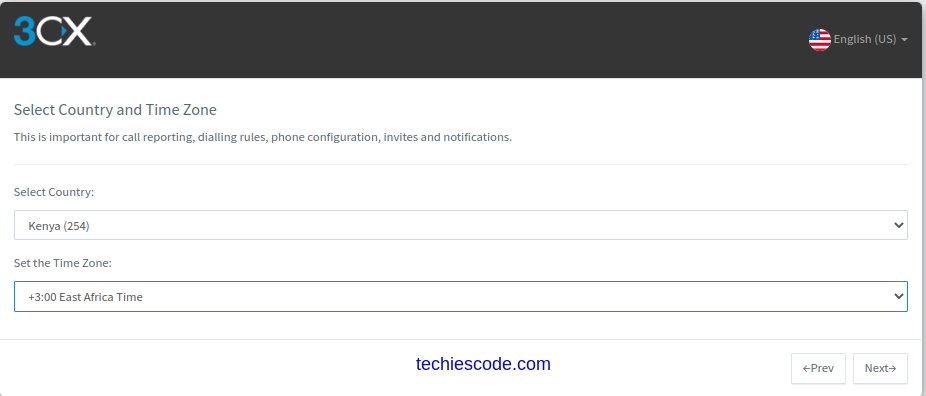
Select country and Time Zone:
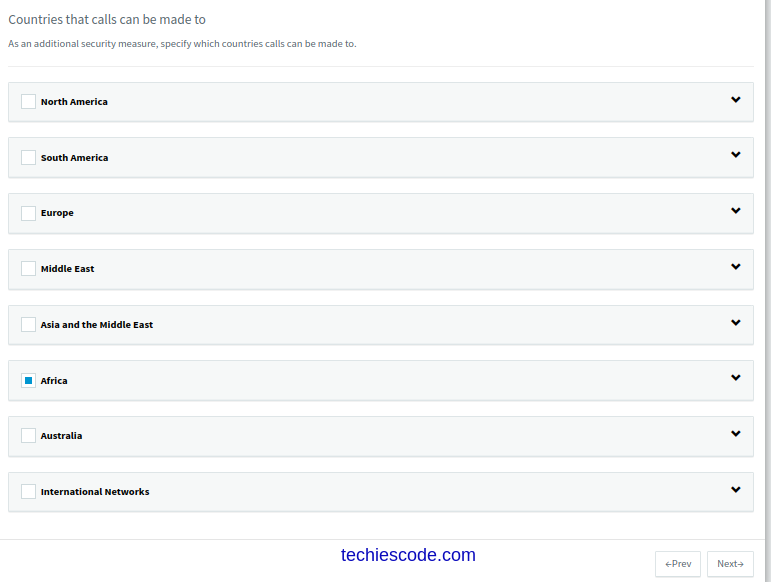
Select the countries that calls can be made to:
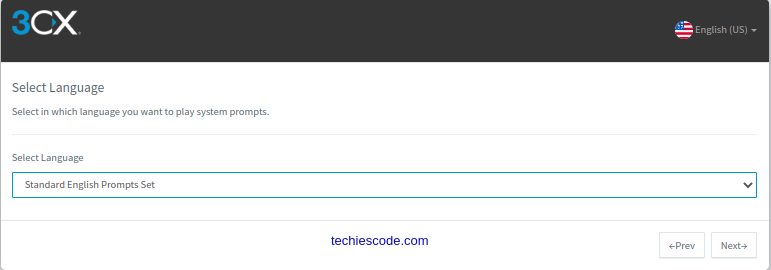
Select the language to play system prompts:
At this point, you’ll be required to wait as the system finalizes the installation. After completion, you’ll receive a pop-up screen with your installation details:
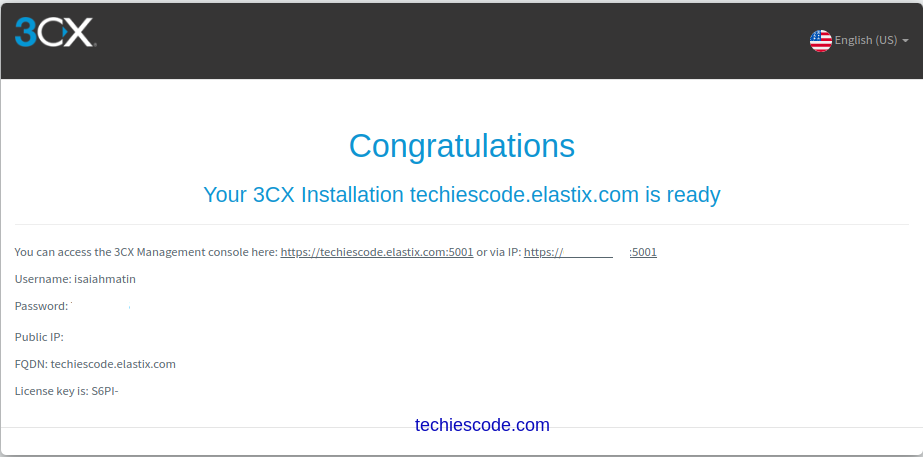
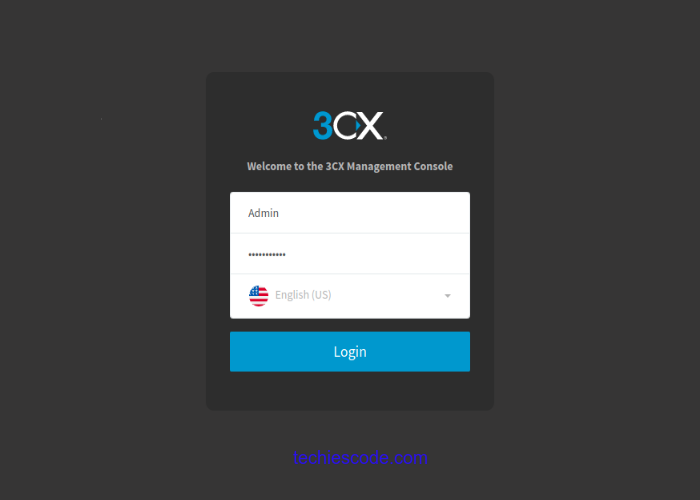
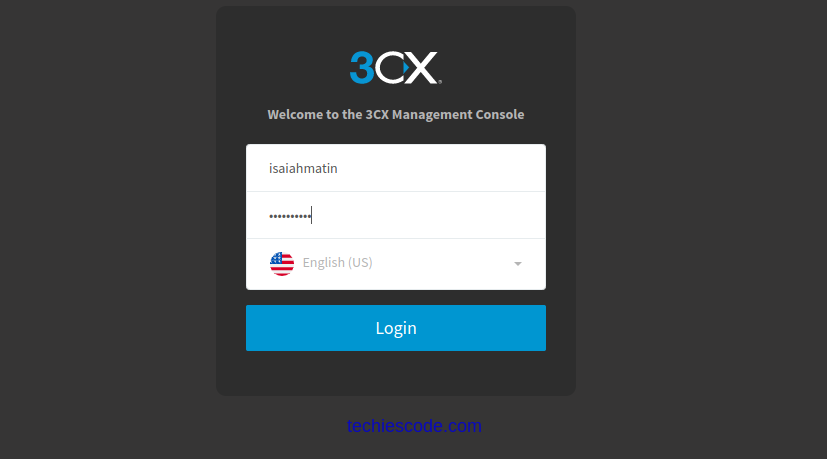
Step 5: Login to 3CX Administration Console
Click on the link on the pop-up page to navigate to the login page of your console. Enter the credentials to log in:
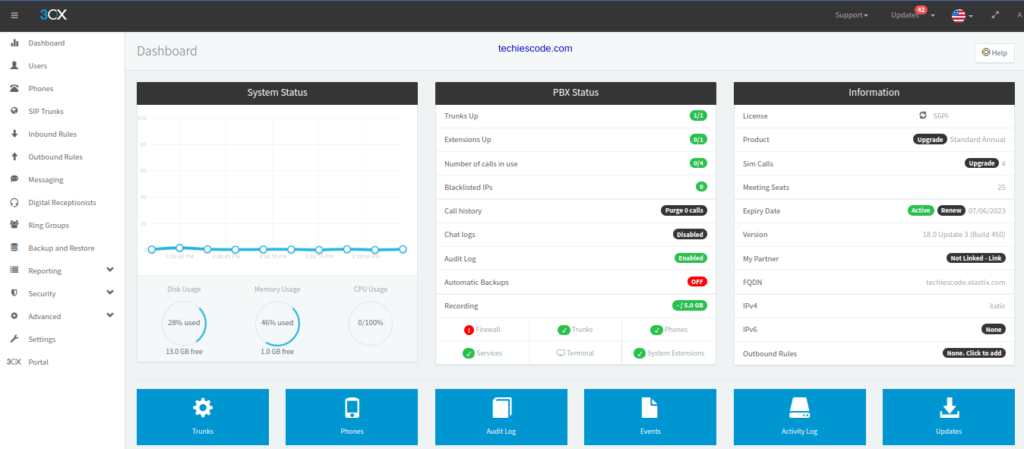
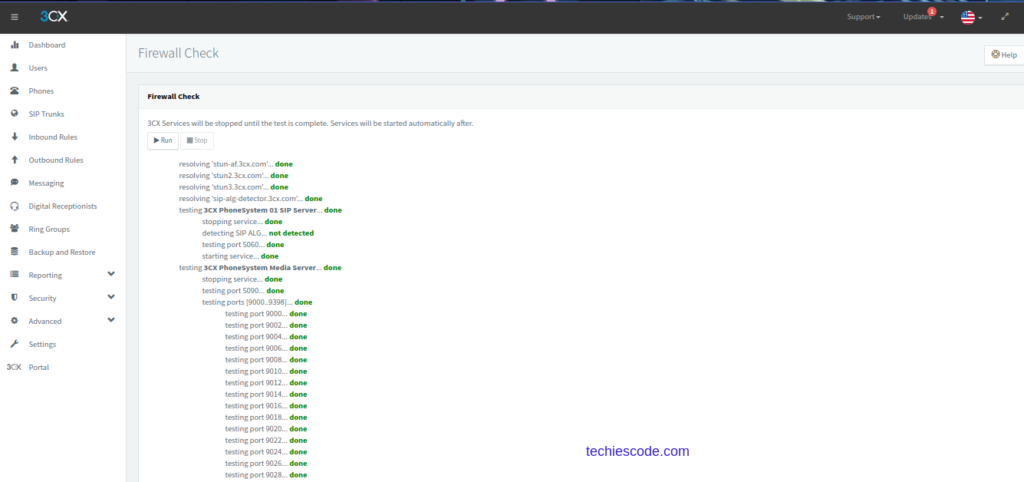
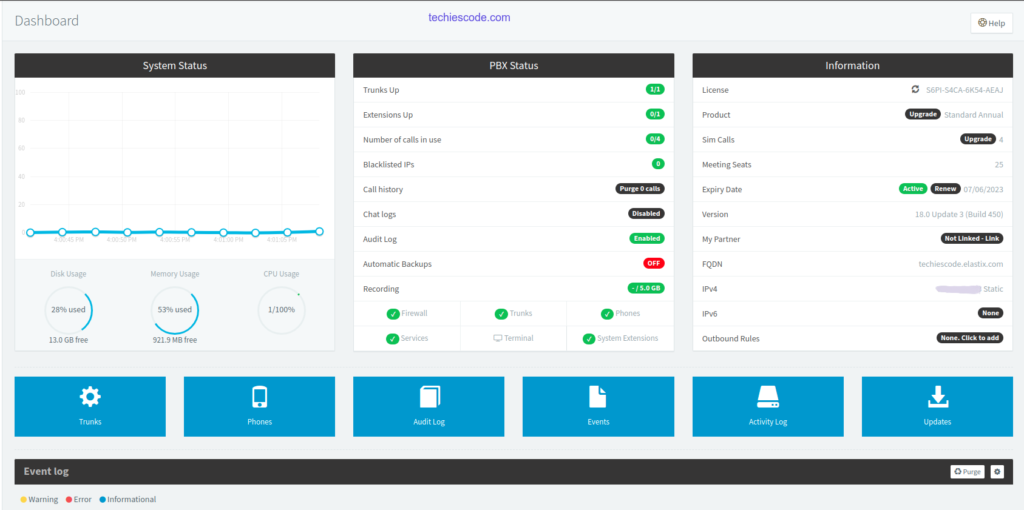
You will be logged in to the admin interface of the 3CX PBX System. The dashboard shows the overall system components. You must run the firewall check to ensure that all ports on the server are reachable.
To run a firewall check, on the dashboard go to the firewall which the red alarm symbol. On the new page click run. On a successful run, you should be able to see a clean screen like the one below. If you get the error you can allow 3CX ports via the firewall manually using the command line
You can now enjoy the numerous resources in the 3CX PBX phone system.
Advantages of 3CX
- It is easier to manage because of the Graphical User Interface(GUI) based configuration interface.
- It is much easier to install and configure 3CX than any proprietary phone system.
- It is cost-effective to buy and expand.
- It provides a better phone usability environment because SIP phones are easier to use.
- It provides better customer service and productivity.
- It eliminates phone wiring.
Conclusion
We have successfully finished the installation and configuration of the 3CX PBX phone system. You can now use the resources for your personal use or incorporate them into your company as well.
We hope you enjoyed the guide, thank you!
How to Install Grafana in Ubuntu 18.04|20.04|22.04