
MySQL Database is an open-source relational database that developers and organizations use to store, accessing and retrieving data. Mysql stores data in a structured manner, stores data in tables. Furthermore, it is not data type biased. It stores all types of data that exist in all formats. This universal feature, systematic way of storing data, and simple way of accessing it have made more people now going for it.
Introduction
It this guide, we are going to discuss on how we can install and configure MySQL database on ubuntu 20.04. Note that there is no difference with this guide when installing on ubuntu 18.04. You can still use this approach and will do perfectly. Before we begin ensure that you have your machine with either ubuntu 18.04 or 20.04 installed.
Installing MySQL
Open terminal in your computer. You can press the start key then search for the terminal or use CTRL+ALT+T as a short to start terminal.
Enter the following command to update our system repositories.
sudo apt-get updateCopy and paste the command below in your terminal to install mysql.
sudo apt-get install mysql-serverThe screen below will appear prompting you to confirm the installation. Just enter the letter Y/y then hit Enter key to continue with the installation.
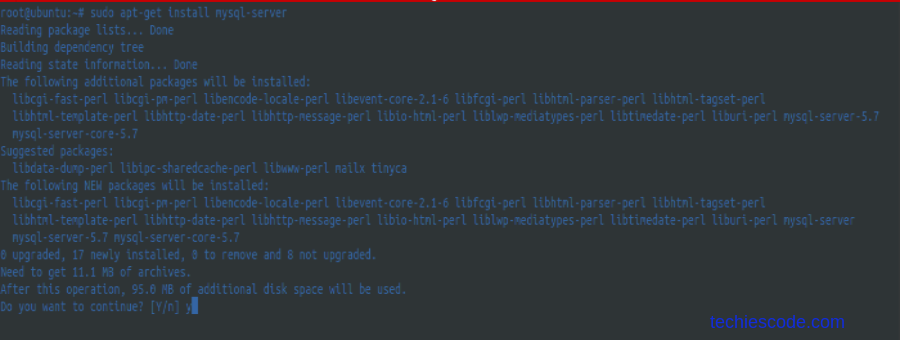
Give the process sometime to run installation to completion.
Mysql comes with default configurations that are not secure on your database. This is because anyone can login as root from anywhere without any authentication.
Configuring MySQL.
Here, we are going to run a secure installation as one of the approaches to secure MySQL. Run the command below on terminal as root.
sudo mysql_secure_installationBy running the above command, we are enhancing security measures to reduce the vulnerability of your database from being exposed to hackers. The following screen will appear which will prompt you to make some changes to MySQL installation’s security options. The screen below will appear.
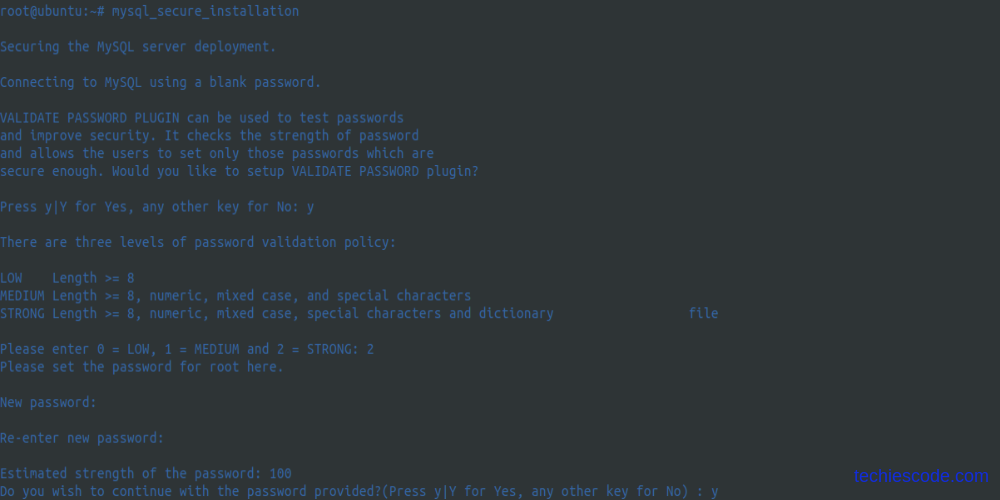
Press y/Y then enter key to accept and continue.
In the second part, you will be given options to select the strength of the password. Please select 2 to use a strong and more secure password.
Enter the new password you would like to use. Re-enter to confirm. If the password matches, then you will be requested to confirm if this is the password you will wish to continue with. Press y/Y then enter to accept.
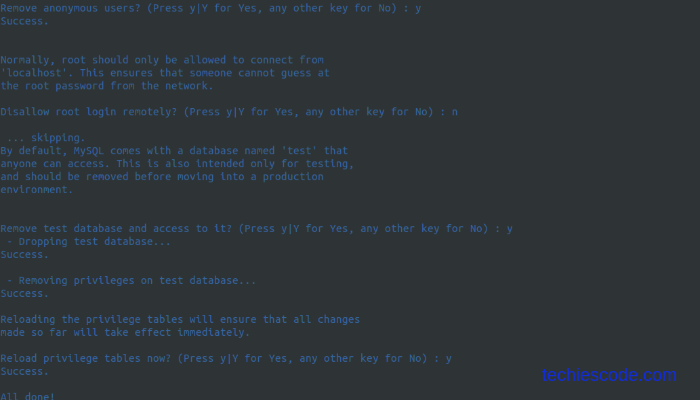
From below, choose your options to match what you are seeing. Here we are removing anonymous users from the database, disallow default user “root” remote login, and removing the test database.
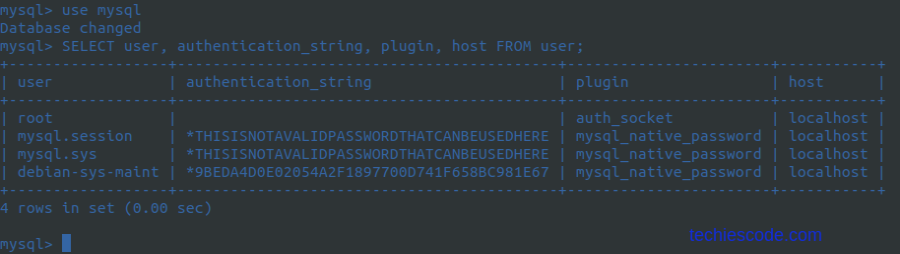
By default, the user does not use a password for authentication to login. Instead uses the auth_socket plugin for authentication. This will highly affect third-party applications such as phpMyAdmin accessibility to the database. Therefore, is advisable you change authentication to mysql_native_password to allow or enable password login.
Enter command below to login to mysql console.
sudo mysqlTo check the current set authentication, run the command below in mysql database.
use mysql;
SELECT user, authentication_string, plugin, host FROM muser;
Output of the above command is shown below.
To change mysql database root user authentication to mysql_native_password use the command below.
Replace “you_password” with a new password if you would like to change the MySQL password you entered earlier or enter one you set in case you would like to maintain it.
ALTER USER ‘root’@‘localhost’ IDENTIFIED WITH mysql_native_password BY ‘your_password’;Then reload database to effect changes by flushing privileges.
FLUSH PRIVILEGES;Now confirm authentication type using the command shown below.
SELECT user, authentication_string, plugin, host FROM myql.user;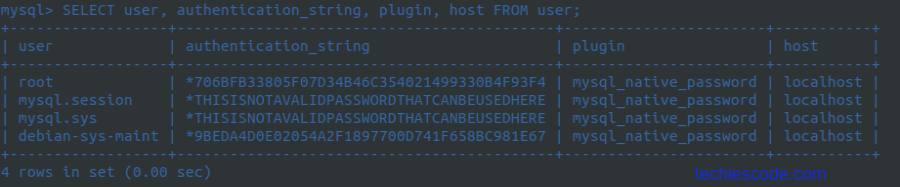
use exit command or quit to logout of MySQL. If you try login in as root to MySQL without a password will realize access denied security enhanced.
We will therefore use the command below to login with password.
mysql -u root -pConclusion
In this article, we have been able to install MySQL database in Ubuntu 18 successfully. Moreover, we have also learned how to secure MySQL database, reducing the chances of the database being compromised. finally, we have also looked at how to change the root user authentication plugin.

One thought on “How To Install MySQL in Ubuntu 18.04”