
Introduction
Pronounced as engine x, Nginx is a popular HTTP web server in the world alongside Apache. Nginx is a free and open-source software that works as a reverse proxy, and standard mail server, and can also be configured as a load balancer.
Nginx is well known for its stability and high performance in powering numerous sites on the web.
In this article, we will learn how to install Nginx in CentOS. You will be required to have the following in place;
- A CentOS server or VM
- An active Domain
- Root privileges
Before you start, ensure you don’t have Apache running on your machine, and remember to log in as root.
Installing Nginx
Step 1: Update the system
Run the system update command below to update your software packages;
$ sudo yum -y updateStep 2: Install Extra Packages for Enterprise Linux
The CentOS package standard repositories do not have the Nginx package, therefore you will need to install the EPEL repo on your server.
Now run the following command to install EPEL using yum package manager;
$ sudo yum install epel-release
Loaded plugins: fastestmirror
Loading mirror speeds from cached hostfile
* base: mirror.aptus.co.tz
* extras: mirror.aptus.co.tz
* updates: mirror.wiru.co.za
Resolving Dependencies
--> Running transaction check
---> Package epel-release.noarch 0:7-11 will be installed
--> Finished Dependency Resolution
Dependencies Resolved
================================================================================
Package                Arch             Version         Repository        Size
================================================================================
Installing:
epel-release           noarch           7-11            extras            15 k
Step 3: Install Nginx
Proceed and install Nginx with the following command;
$ sudo yum install nginx
Loaded plugins: fastestmirror
Loading mirror speeds from cached hostfile
epel/x86_64/metalink                                                                                                           |  47 kB  00:00:00
* base: mirror.aptus.co.tz
* epel: d2lzkl7pfhq30w.cloudfront.net
* extras: mirror.aptus.co.tz
* updates: mirror.wiru.co.za
epel                                                                                                                           | 4.7 kB  00:00:00
(1/3): epel/x86_64/group_gz                                                                                                    |  96 kB  00:00:00
(2/3): epel/x86_64/updateinfo                                                                                                  | 1.1 MB  00:00:02
(3/3): epel/x86_64/primary_db                                                                                                  | 7.0 MB  00:00:05
Resolving Dependencies
--> Running transaction check
---> Package nginx.x86_64 1:1.20.1-9.el7 will be installed
--> Processing Dependency: nginx-filesystem = 1:1.20.1-9.el7 for package: 1:nginx-1.20.1-9.el7.x86_64
--> Processing Dependency: libcrypto.so.1.1(OPENSSL_1_1_0)(64bit) for package: 1:nginx-1.20.1-9.el7.x86_64
--> Processing Dependency: libssl.so.1.1(OPENSSL_1_1_0)(64bit) for package: 1:nginx-1.20.1-9.el7.x86_64
--> Processing Dependency: libssl.so.1.1(OPENSSL_1_1_1)(64bit) for package: 1:nginx-1.20.1-9.el7.x86_64
--> Processing Dependency: nginx-filesystem for package: 1:nginx-1.20.1-9.el7.x86_64
--> Processing Dependency: redhat-indexhtml for package: 1:nginx-1.20.1-9.el7.x86_64
--> Processing Dependency: libcrypto.so.1.1()(64bit) for package: 1:nginx-1.20.1-9.el7.x86_64
--> Processing Dependency: libprofiler.so.0()(64bit) for package: 1:nginx-1.20.1-9.el7.x86_64
--> Processing Dependency: libssl.so.1.1()(64bit) for package: 1:nginx-1.20.1-9.el7.x86_64
Step 4: Start Nginx Service
Nginx is now installed on your CentOS machine, however, it won’t start automatically until you start it manually.
To start the Nginx service, run;
$ sudo systemctl start nginxNow check if it’s running with the following command;
$ sudo systemctl status nginxYou should be able to see a similar output to the one below showing Nginx is up and running.
● nginx.service - The nginx HTTP and reverse proxy server
Loaded: loaded (/usr/lib/systemd/system/nginx.service; disabled; vendor preset: disabled)
Active: active (running) since Jim 2022-07-01 13:04:51 EAT; 11s ago
Process: 68260 ExecStart=/usr/sbin/nginx (code=exited, status=0/SUCCESS)
Process: 68258 ExecStartPre=/usr/sbin/nginx -t (code=exited, status=0/SUCCESS)
Process: 68254 ExecStartPre=/usr/bin/rm -f /run/nginx.pid (code=exited, status=0/SUCCESS)
Main PID: 68262 (nginx)
CGroup: /system.slice/nginx.service
├─68262 nginx: master process /usr/sbin/nginx
├─68263 nginx: worker process
└─68264 nginx: worker process
Step 5: Configure Nginx to start up on boot
This ensures that Nginx starts up automatically whenever the server restarts,
run the following;
$ sudo systemctl enable nginxStep 6: Configure Firewall to allow Nginx traffic
Since centOS built-in firewall is set to block Nginx traffic by default, you should update the system firewall rules to permit inbound packets on HTTP and HTTPS. This will hence allow web traffic on Nginx.
Run the following commands;
$ firewall-cmd --zone=public --permanent --add-service=http
$ firewall-cmd --zone=public --permanent --add-service=https
$ firewall-cmd --reload
After every command, an output of
success
will be shown;
[root@localhost ~]# firewall-cmd --zone=public --permanent --add-service=http
success
[root@localhost ~]# firewall-cmd --zone=public --permanent --add-service=https
success
[root@localhost ~]# firewall-cmd --reload
success
Step 6: Test Nginx Server
In your preferred browser, enter your Ip address or domain name to confirm whether Nginx is working as expected. You should be able to see a welcome page similar as shown below;
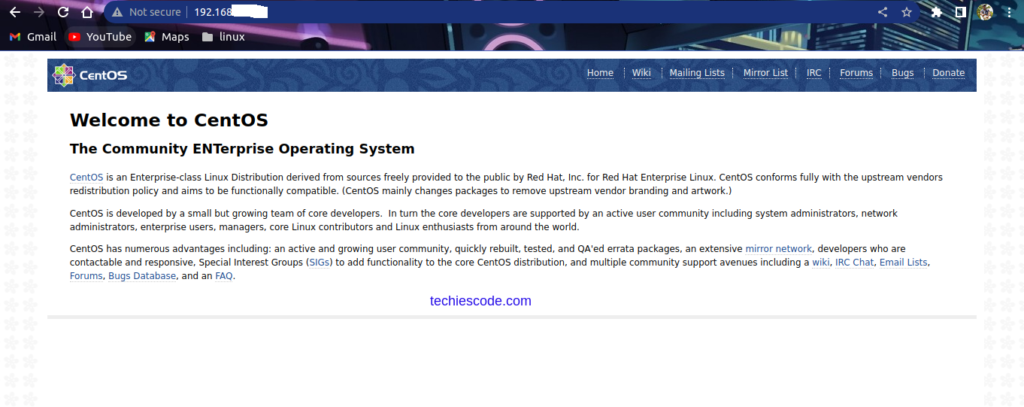
Now you are confident that your Nginx has been successfully installed and it’s running.
Managing Nginx
There are a number of techniques used to troubleshoot and ensure the efficient running of Nginx. We are going to discuss a few;
Start Nginx
To start the Nginx service after installation, run;
$ sudo systemctl start nginxStop Nginx
To stop the Nginx service, run;
$ sudo systemctl stop nginxReload Nginx
$ sudo systemctl restart nginxDisable automatic start
To disable automatic start on boot, run;
$ sudo systemctl disable nginxAt this point, you should be done with the installation of Nginx.
Conclusion
You have successfully installed Nginx on your CentOS 7 machine. You can go ahead and explore more on configuring Nginx server blocks.
Thank you for visiting our site!
How to Install Docker in Ubuntu