
File transfer protocol (FTP) is one of the most used network protocol tools for transferring files between two computer systems over a network. However, FTP itself is not a secure protocol since it does not support any encryptions and therefore it puts a system at a risk to be compromised and this is where Vsftpd (Very Secure File Transfer daemon) Protocol comes in.
Vsftpd is therefore a secure protocol that allows encryption of information transfer between systems. Vsftpd is licensed under GNU GPL and it is used as a default FTP server for most Linux distributions. We are therefore going to look at the steps of installing Vsftpd on the Linux Ubuntu system in this tutorial using the terminal.
Vsftpd comes along with a number of features which makes it widely used.
- Secure – it uses SSL/TLS to encrypt files being transferred between a user and an FTP server.
- Stability – it is a very consistent and reliable FTP server.
- Very fast – it takes a very short time to upload and download large files since the files are being downloaded and uploaded using a private tunnel.
- Supports virtual users – it is more secure because whenever a real user account is compromised, a user can only use the FTP server but can not log in to the system to use other services like SSH.
The following steps should lead you to install and configure Vsftpd successfully in a more efficient manner.
Step 1: System Update
Open the terminal and run the update command
sudo apt-get updateStep 2: Install Vsftpd Ubuntu 20.04
Run the following command to install Vsftpd on ubuntu
sudo apt install -y vsftpdPress enter to start the installation process.
After installation, run another command to ensure that Vsftpd is up and running
sudo systemctl ststus vsftpd ● vsftpd.service - vsftpd FTP server
Loaded: loaded (/lib/systemd/system/vsftpd.service; enabled; vendor preset: enabled)
Active: active (running) since Sun 2022-05-01 22:55:28 EAT; 5min ago
Main PID: 58428 (vsftpd)
Tasks: 1 (limit: 2269)
Memory: 752.0K
CGroup: /system.slice/vsftpd.service
└─58428 /usr/sbin/vsftpd /etc/vsftpd.conf
Vsftpd is now installed, up and running.
Step 3. Create FTP User and its Directory
You should now create a user that will be used to access the FTP server.
    $ sudo adduser ftpuser
    Adding user `ftpuser' ...
Adding new group `ftpuser' (1002) ...
Adding new user `ftpuser' (1002) with group `ftpuser' ...
Creating home directory `/home/ftpuser' ...
Copying files from `/etc/skel' ...
New password:
Retype new password:
passwd: password updated successfully
Changing the user information for ftpuser
Enter the new value, or press ENTER for the default
Full Name []:
Room Number []:
Work Phone []:
Home Phone []:
Other []:
Is the information correct? [Y/n] y
Create an FTP directory and grant necessary permissions and ownership effectively.
 sudo mkdir -p /home/ftpuser/ftpdir
sudo chmod -R 750 /home/ftpuser/ftpdir
sudo chown ftpuser: /home/ftpuser/ftpdir
Now add FTP user to /etc/vsftpd/user_list file to grant user access to the vsftpd server.
$ sudo chown ftpuser: /home/ftpuser/ftpdirStep 4: Configure Vsftpd
Now allow the user to be able to access the FTP server by making configuration in Vsftpd file configuration. Open configuration file in /etc/vsftpd/vsftpd.conf to start editing.
sudo vim /etc/vsftpd.confAllow remote access to local users then block anonymous users. If lines are missing, add them.
anonymous_enable = NO
local_enable = YES
Now give the user permission to run FTP commands such as uploading, downloading, deleting, and adding files by uncommenting the line write_enable=YES.
write_enable=YESAllow only the user’s directory to be accessed by uncommenting line chroot_local_user=YES.
chroot_local_user=YESSince Vsftpd operates in active mode by default, set the minimum and maximum ranges to use passive mode.
pasv_min_port=3000
pasv_max_port=3100
Configure Vsftpd to allow just specified people to log in.
userlist_enable=YES
userlist_file=/etc/vsftpd.user_lis
userlist_deny=NO
Save and close the file. Restart the Vsftpd services to allow changes to synchronize.
sudo systemctl restart vsftpdNow test your FTP connection by running the ftp command followed by your server IP.
Fill in the username and the password you set before.
Vsftpd can be configured ftp 192.168.3.7<
Connected to 192.162.3.7
220 (vsFTPd 3.0.3)
Name (192.168.3.7:isaiah): ftpuser
331 Please specify the password.
Password:
230 Login successful.
Remote system type is UNIX.
Using binary mode to transfer files
200 PORT command successful. Consider using PASV.
150 Here comes the directory listing.
drwxr-x--- 2 1002  1002 4096 May 01 23:07 ftpdir
226 Directory send OK.
Step 5. Vsftpd firewall configuration
Now you should allow FTP traffic on port 20, FTP data on port 21, and passive connection with VSFTPD on ports 30000-31000.
sudo ufw allow 20:21/tcp
sudo ufw allow 30000:31000/tcp
Then reload the firewall to take effect.
sudo ufw disable
sudo ufw enable
You have to find an FTP client known as FileZilla to connect to the FTP server. To install FileZilla, run the following command.
Step 6: test Vsftpd with FileZilla FTP Client
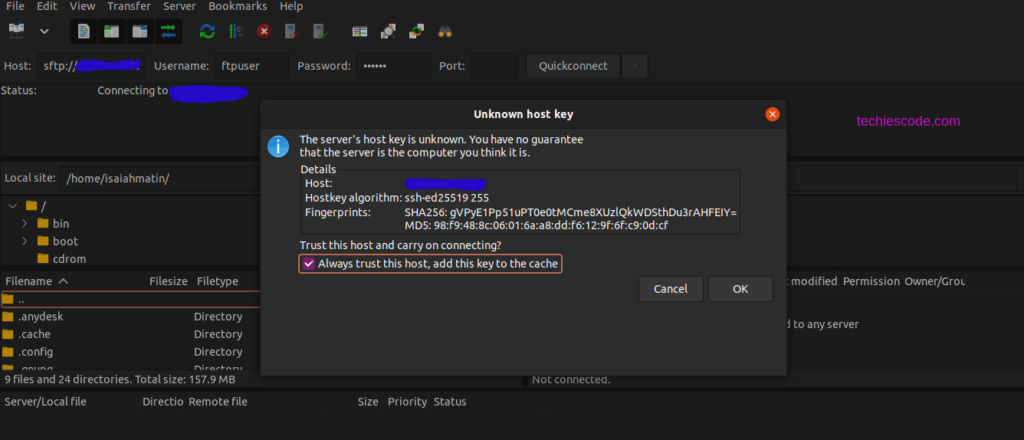
$ sudo apt install FileZillaAfter the installation, you can now connect to Vsftpd using your FTP client by entering the Vsftpd server IP, username, and password respectively.
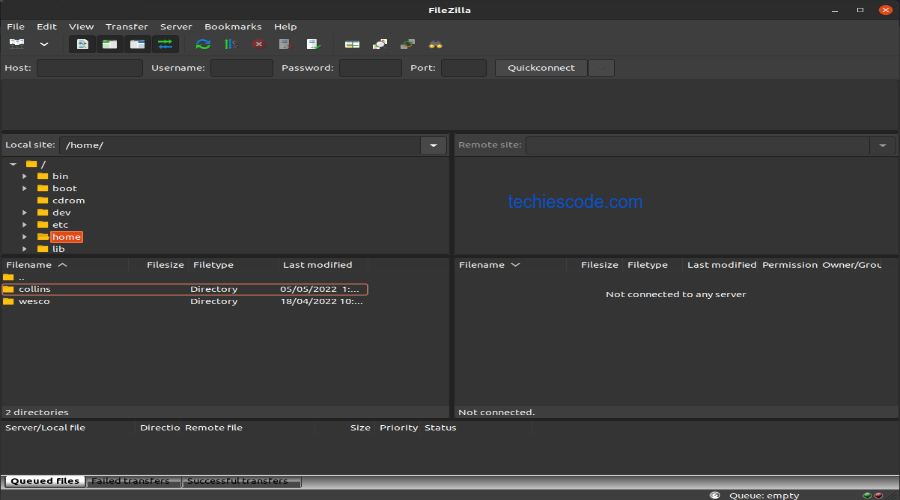
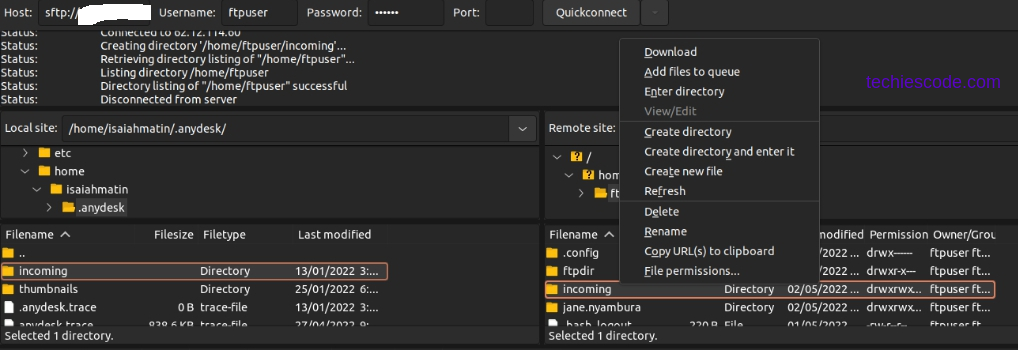
Click the quick connect button on the left-hand side after launching FileZilla.
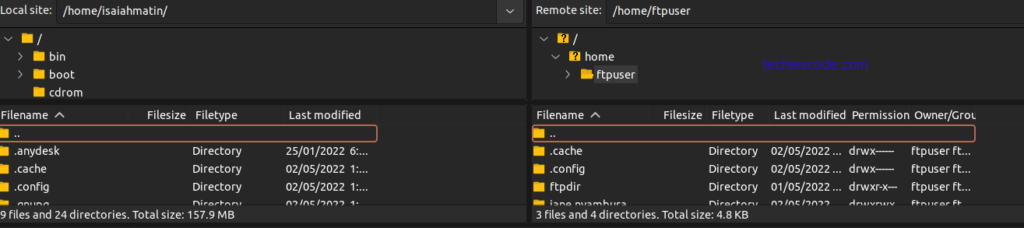
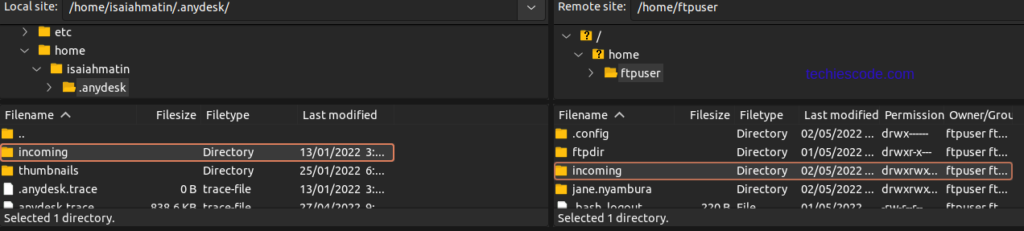
Correct credentials will take you to a split-screen like the one shown below. The left side has files on your local server while the right side has files on your Vsftpd server.
Now attempt the file upload with the FTP client. Right-click on the file you wish to upload and then click the upload button which will pop up to upload the file.
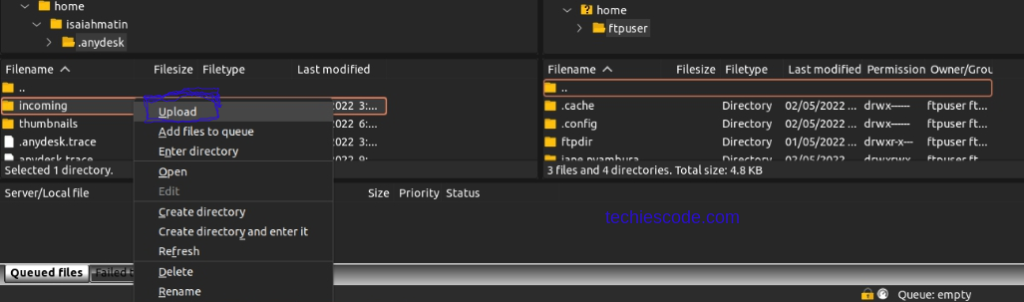
The file is now uploaded as it can be seen on both sides of the split-screen.
Now download the file from the server. Right-click on the file and you will see the download button, click to download.
Having finished all the steps, you are now in a good position to share files remotely between different computers with Vsftpd.
conclusion
We have successfully installed Vsftpd and we hope you find this tutorial intresting.

One thought on “How to install vsftpd on ubuntu 20.04”