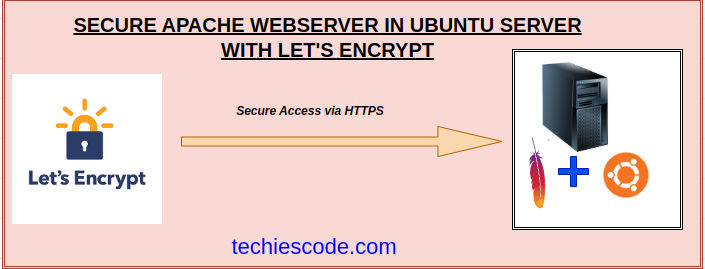
This tutorial will teach you how to enhance the security of the Apache web server on Ubuntu 20.04 using Let’s Encrypt. You might already know that Let’s Encrypt is a freely available certificate authority created by the Internet Security Research Group(ISRG), which allows web servers to establish encrypted HTTPS connections by acquiring and installing TLS/SSL certificates at no cost.
To streamline the necessary procedures, Let’s Encrypt employs a software client named Certbot for automation.

Prerequisites
You will need to have the following for a successful installation of Let’s Encrypt in Ubuntu.
- Ubuntu server set up.
- A non-root user with a firewall and root privileges.
- Apache installed with Virtual Hosts well configured. If not, you can refer to How to Install Apache in Ubuntu 18.04/20.04 and How to Configure Virtual Hosts in Apache.
- A fully registered domain name. We will be using my_domain for demonstration purposes, remember to replace it with your domain name.
Step 1: Install Certbot
To get and renew the SSL certificate, we will need to install the Certbot software on the server. Alongside Certbot, we will also need a plugin that will integrate Certbot with Apache. The following single command will install both:
$ sudo apt install certbot python3-certbot-apachePress y when prompted then hit Enter to finish the installation.
After the installation, you can check its version by running the following command.
$ certbot --version
certbot 0.40.0
As you can see, version 0.40.0 of certbot is installed.
Your server is now installed with certbot. In the following step, we will check Apache’s configuration to confirm that your virtual host is properly configured. This process guarantees that the certbot client script can identify your domains and automatically update your web server to utilize the newly generated SSL certificate.
Step 2: Check your Apache Virtual Host Configuration
The virtual host you set up should be located at
/etc/apache2/sites-available/my_domain.conf
.
Using your preferred text editor like Nano, open the virtual host file for your domain and check it.
$ sudo nano /etc/apache2/sites-available/own_domain.conf
<VirtualHost *:80>
#ServerName example.com
ServerName apachessl.techiescode.com
ServerAdmin webmaster@localhost
DocumentRoot /var/www/tuangaze
# Available loglevels: trace8, ..., trace1, debug, info, notice, warn,
# error, crit, alert, emerg.
# It is also possible to configure the loglevel for particular
# modules, e.g.
#LogLevel info ssl:warn
ErrorLog ${APACHE_LOG_DIR}/error.log
CustomLog ${APACHE_LOG_DIR}/access.log combined
# following line enables the CGI configuration for this host only
# after it has been globally disabled with "a2disconf".
#Include conf-available/serve-cgi-bin.conf
</VirtualHost>
Step 3: Enable and configure Firewall
Here, you will need to make changes to allow HTTPS traffic by using Ubuntu’s default and pre-installed UFW to configure the firewall rules.
First, check the UFW rules status by running the following command:
$ sudo ufw status

Status: active
To                         Action      From
--                         ------      ----
22/tcp                     ALLOW       Anywhere
22/tcp (v6)                ALLOW       Anywhere (v6)
The status may be inactive, therefore enable it using the command below:
$ sudo ufw enableThe firewall is now active and enabled on system startup.
To allow Apache via firewall you can directly allow ports or use a pre-installed app. To view list of UFW apps run this command.
$ sudo ufw app list

Available applications:
Apache
Apache Full
Apache Secure
Nginx Full
Nginx HTTP
Nginx HTTPS
OpenSSH
Now allow Apache Full to enable HTTPS traffic with the following command:
$ sudo ufw allow 'Apache Full'
Rule added
Rule added (v6)
Recheck its status to verify the configuration
$ sudo ufw statusYour output should be looking like this
Status: active
To                         Action      From
--                         ------      ----
22/tcp                     ALLOW       Anywhere
Apache Full                ALLOW       Anywhere
22/tcp (v6)                ALLOW       Anywhere (v6)
Apache Full (v6)           ALLOW       Anywhere (v6)
Step 4: Get the Let’s Encrypt SSL certificate
There are several options to get an SSL Certificate. Here, we will use the Apache plugin which is responsible for automatically adjusting and reloading the Apache configuration as needed. To achieve that, run the following command:
$ sudo certbot --apacheThe execution will prompt you to provide a valid email address for urgent renewal and security notices.
Saving debug log to /var/log/letsencrypt/letsencrypt.log
Plugins selected: Authenticator apache, Installer apache
Enter email address (used for urgent renewal and security notices) (Enter 'c' to
cancel):
- - - - - - - - - - - - - - - - - - - - - - - - - - - - - - - - - - - - - - - -
Next, it will prompt you to accept the terms and conditions by clicking
A
and hitting
ENTER
.
- - - - - - - - - - - - - - - - - - - - - - - - - - - - - - - - - - - - - - - -
Please read the Terms of Service at
https://letsencrypt.org/documents/LE-SA-v1.3-September-21-2022.pdf. You must
agree in order to register with the ACME server at
https://acme-v02.api.letsencrypt.org/directory
- - - - - - - - - - - - - - - - - - - - - - - - - - - - - - - - - - - - - - - -
(A)gree/(C)ancel: A
- - - - - - - - - - - - - - - - - - - - - - - - - - - - - - - - - - - - - - - -
You will then be asked if you can share your email address with the Electronic Frontier Foundation to receive EFF news, campaigns, etc. If yes, type Y otherwise type N and hit enter.
- - - - - - - - - - - - - - - - - - - - - - - - - - - - - - - - - - - - - - - -
Would you be willing to share your email address with the Electronic Frontier
Foundation, a founding partner of the Let's Encrypt project and the non-profit
organization that develops Certbot? We'd like to send you email about our work
encrypting the web, EFF news, campaigns, and ways to support digital freedom.
- - - - - - - - - - - - - - - - - - - - - - - - - - - - - - - - - - - - - - - -
(Y)es/(N)o: N
At this point, you will be asked the domain names you would like to activate HTTPS for. Automatically, your domain names will be listed from your Apache virtual host configuration. Be sure to select the domain name with an A record. To enable HTTPS for all listed domain names, leave the prompt blank and hit ENTER. Otherwise, type either
1
or
2
to select your preferred domain name and hit
ENTER
.
Which names would you like to activate HTTPS for?
- - - - - - - - - - - - - - - - - - - - - - - - - - - - - - - - - - - - - - - -
1: my_domain
2: www.my_domain
- - - - - - - - - - - - - - - - - - - - - - - - - - - - - - - - - - - - - - - -
Select the appropriate numbers separated by commas and/or spaces, or leave input
blank to select all options shown (Enter 'c' to cancel): 1
Obtaining a new certificate
Performing the following challenges:
http-01 challenge for apachessl.techiescode.com
Enabled Apache rewrite module
Waiting for verification...
Cleaning up challenges
Created an SSL vhost at /etc/apache2/sites-available/apachessl-le-ssl.conf
Enabled Apache socache_shmcb module
Enabled Apache ssl module
Deploying Certificate to VirtualHost /etc/apache2/sites-available/apachessl-le-ssl.conf
Enabling available site: /etc/apache2/sites-available/apachessl-le-ssl.conf
Redirect all incoming traffic to HTTPS.
Please choose whether or not to redirect HTTP traffic to HTTPS, removing HTTP access.
- - - - - - - - - - - - - - - - - - - - - - - - - - - - - - - - - - - - - - - -
1: No redirect - Make no further changes to the webserver configuration.
2: Redirect - Make all requests redirect to secure HTTPS access. Choose this for
new sites, or if you're confident your site works on HTTPS. You can undo this
change by editing your web server's configuration.
- - - - - - - - - - - - - - - - - - - - - - - - - - - - - - - - - - - - - - - -
Select the appropriate number [1-2] then [enter] (press 'c' to cancel): 2
Enabled Apache rewrite module
Redirecting vhost in /etc/apache2/sites-enabled/apachessl.conf to ssl vhost in /etc/apache2/sites-available/apachessl-le-ssl.conf
You will receive a congratulatory message at the end of the execution meaning the certificates have been obtained successfully into your Apache,s configuration.
- - - - - - - - - - - - - - - - - - - - - - - - - - - - - - - - - - - - - - - -
Congratulations! You have successfully enabled https://my_domain
You should test your configuration at:
https://www.ssllabs.com/ssltest/analyze.html?d=my_domain
- - - - - - - - - - - - - - - - - - - - - - - - - - - - - - - - - - - - - - - -
Step 5: Verify Certbots Auto-renewal
You should verify if the auto-renewal service is active by running the following command:
$ sudo systemctl status certbot.timerYour output should be similar to this:
● certbot.timer - Run certbot twice daily
Loaded: loaded (/lib/systemd/system/certbot.timer; enabled; vendor preset: enabled)
Active: active (waiting) since Thu 2023-06-15 12:50:47 UTC; 1 months 3 days ago
Trigger: Wed 2023-07-19 11:09:10 UTC; 2h 32min left
Triggers: ● certbot.service
Jun 15 12:50:47 cloud systemd[1]: Started Run certbot twice daily.
You can do a dry run to test the renewal process with the following command:
$ sudo certbot renew --dry-run
Congratulations, all renewals succeeded. The following certs have been renewed:
/etc/letsencrypt/live/my_domain/fullchain.pem (success)
** DRY RUN: simulating 'certbot renew' close to cert expiry
**          (The test certificates above have not been saved.)
- - - - - - - - - - - - - - - - - - - - - - - - - - - - - - - - - - - - - - - -
cloud@cloud:~$
Well done! You have successfully secured the Apache web server with Let’s Encrypt.
Conclusion
In conclusion, securing Apache web servers with Let’s Encrypt on Ubuntu involves a straightforward procedure that enhances the server’s security and enables encrypted HTTPS connections. By following the steps outlined in the guide, you can ensure the confidentiality and integrity of the data transmitted between the server and the clients. Let’s Encrypt as a free and automated Certificate Authority, simplifies the acquisition and installation of SSL/TSL certificates through Certbot, its software client.
As this approach strengthens the security of the web server, it also promotes the widespread adoption of secure communication protocols on the internet. By implementing Let’s Encrypt and Certbot, Ubuntu users can enjoy the benefits of encrypted connections without the burden of costly certificates.


