Introduction
Virtual hosting is the act of hosting more than one website on a single machine. Let’s say for example you have two websites namely test1.com and test2.com, instead of running the two websites separately on different machines, virtual hosting allows you to host both of the websites on the same machine. This can be achieved with Apache virtual hosts.
In this tutorial, we are going to see how we can configure Apache virtual hosts and be able to host multiple websites on one server. You need to have your Ubuntu VPS running on the cloud like Angani Cloud.
Before that, let’s have a look at the types of virtual hosting available in apache. We have two types namely IP-based virtual hosting and name-based virtual hosting. IP-based virtual hosting acts in such a way that you can be able to host multiple webservers on a single machine but each webserver has its own IP address while name-based virtual hosting is nearly the opposite of IP-based hosting such that you are able to host multiple websites on the same machine using the same IP address.
step 1: Install Apache
Now, to successfully set up Apache virtual hosts, you will need to have sudo privileges in your ubuntu server and the latest version of Apache. Therefore you should install Apache, and use the following command;
$ sudo apt-get install apache2
Suggested packages:
www-browser apache2-doc apache2-suexec-pristine | apache2-suexec-custom openssl-blacklist
The following NEW packages will be installed:
apache2 apache2-bin apache2-data apache2-utils libapr1 libaprutil1 libaprutil1-dbd-sqlite3 libaprutil1-ldap liblua5.2-0 ssl-cert
0 upgraded, 10 newly installed, 0 to remove and 0 not upgraded.
Need to get 1730 kB of archives.
After this operation, 6997 kB of additional disk space will be used.
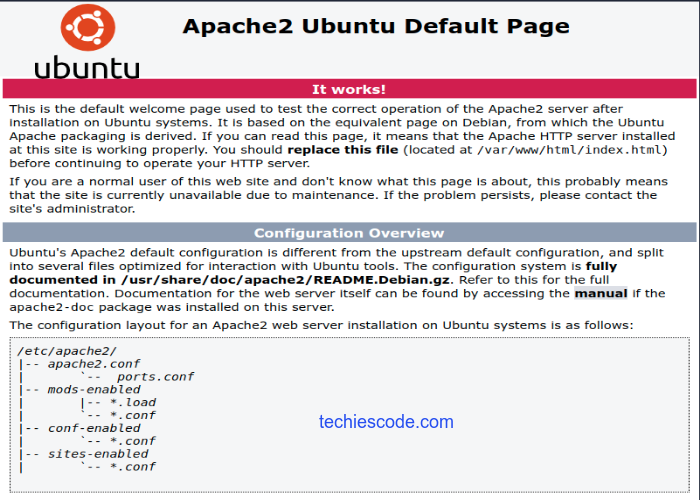
Do you want to continue? [Y/n] YTest if its running, if not remove Nginx if you had installed it earlier then, on a new terminal window, start apache2;
$ systemctl start apache2now test if it’s running;
$ systemctl status apache2
● apache2.service - The Apache HTTP Server
Loaded: loaded (/lib/systemd/system/apache2.service; enabled; vendor>
Active: active (running) since Wed 2022-05-18 16:53:19 EAT; 50s ago
Docs: https://httpd.apache.org/docs/2.4/
Process: 278168 ExecStart=/usr/sbin/apachectl start (code=exited, sta>
Main PID: 278187 (apache2)
Tasks: 55 (limit: 2260)
Memory: 6.2M
CGroup: /system.slice/apache2.service
├─278187 /usr/sbin/apache2 -k start
├─278188 /usr/sbin/apache2 -k start
└─278189 /usr/sbin/apache2 -k start
Step 2: Create web directories
We will first create a directory that will act as a storage site for our virtual host’s data. For my case, am going to use test1.com and test2.com as my domain names for illustration purposes. Remember to replace them with your own domain names!
Let’s start by creating a directory for our first domain, test1.com. Enter the following;
$ sudo mkdir -p /var/www/html/test1.com/public_htmlthen for the second;
$ sudo mkdir -p /var/www/html/test2.com/public_htmlStep 3: Grant user permissions
Since the directories are owned by the root user, we should change the permissions to the currently logged-in non-user to allow him to modify changes to the files.
sudo chown -R apache: /var/www/html/test1.com/public_html
sudo chown -R apache: /var/www/html/test2.com/public_html
Then set read and write permissions for the current logged-in user;
$ sudo chmod -R 755 /var/www/html/Step 4: Create a sample page
We will have to create a demo page that will contain the content which will be displayed when you visit your site on the browser. To do so, enter;
$ sudo vim /var/www/html/test1.com/public_html/index.htmlPaste in the following content;
<html>
<head>
<title><center>WELCOME TO TEST1.COM</title>
</head>
<body>
<h1><center>Bravo! You have successfully configured test1.com virtual host</h1>
</body>
</html>
Save and close the file.
For the second one, do the same.
$ sudo vim /var/www/test2.com/public_html/index.htmlpaste in the following content;
<html>
<head>
<title><center>WELCOME TO TEST2.COM</title>
</head>
<body>
<h1><center>Bravo! You have successfully configured test2.com virtual host</h1>
</body>
</html>
Save and close the file.
Step 4: Create configuration files
We will create configuration files for each of the virtual hosts for each. We will use the default virtual host that comes with Apache to copy the content that we’ll use as a template.
For our first virtual host;
$ sudo cp /etc/apache2/sites-available/000-default.conf /etc/apache2/sites-available/test1.confUsing nano editor, open the file with sudo privileges.
$ sudo vim /etc/apache2/sites-available/test1.confModify the file so that the final product looks like the one below;
<VirtualHost *:80>
# The ServerName directive sets the request scheme, hostname and port that
# the server uses to identify itself. This is used when creating
# redirection URLs. In the context of virtual hosts, the ServerName
# specifies what hostname must appear in the request's Host: header to
# match this virtual host. For the default virtual host (this file) this
# value is not decisive as it is used as a last resort host regardless.
# However, you must set it for any further virtual host explicitly.
#ServerName www.example.com
ServerAdmin [email protected]
DocumentRoot /var/www/html/test1.com/public_html
Save and close the file.
Let’s move to the second virtual host.
$ sudo cp /etc/apache2/sites-available/000-default.conf /etc/apache2/sites-available/test2.confEdit the file.
$ sudo nano /etc/apache2/sites-available/test2.confAlso, modify its file;
<VirtualHost *:80>
# The ServerName directive sets the request scheme, hostname and port that
# the server uses to identify itself. This is used when creating
# redirection URLs. In the context of virtual hosts, the ServerName
# specifies what hostname must appear in the request's Host: header to
# match this virtual host. For the default virtual host (this file) this
# value is not decisive as it is used as a last resort host regardless.
# However, you must set it for any further virtual host explicitly.
#ServerName www.example.com
ServerAdmin [email protected]
DocumentRoot /var/www/html/test2.com/public_html
Save and exit the file.
Step 5: Enable new virtual host files
We need to enable the new virtual hosts that we have created. To perform the task, do the following;
$ sudo a2ensite test1.conf
$ sudo a2ensite test2.conf
Now disable the default site with the following;
$ sudo a2dissite 000-default.confRestart Apache2 to enable the changes to take effect;
$ systemctl restart apache2Virtual hosts are now successfully set up. Go ahead and test them.
Step 6: Add Your domains to the “/etc/hosts” File
Open your /etc/hosts file and add point all your two domains to your server IP as shown below. Make sure that you have your A record for both domains pointing to the same IP in CPanel.
$ vim /etc/hosts

192.168.100.16 test1.com
192.168.100.16 test2.com
Step 7: Test virtual hosts
Open your browser and search for the domains you have configured. You should be able to see the content in the sample pages you created earlier.
http://test1.comFor the first domain, the output will look like this;

Again browse your second domain name in your browser of choice;
http://test2.comThe output will look like this;

If you are able to see the content that you created earlier in your sample pages, then you have successfully configured two virtual hosts in apache.
Conclusion
We have successfully set up virtual hosts in Apache2. You are now in a position to go further and host as many websites as possible. Thank you for visiting our site!
How to Install Docker in Ubuntu
How To Install and Configure PHP-FPM 8.1 WITH NGINX IN Ubuntu 22.04|20.04|18.04